| | | |
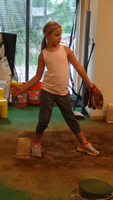
| Correct Technique | | Faulty Technique |
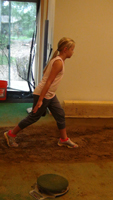
| Push Straight Ahead
|
 |
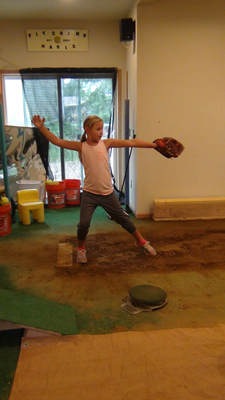
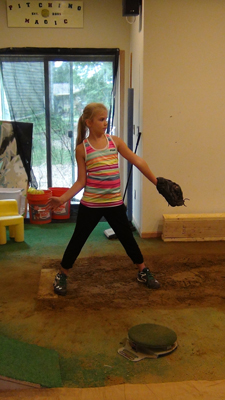
Sure, everybody strides towards home plate. The object is to do that with a lot of power in the lower body. The toe, ankle and knee joints are simply better at going straight ahead than sideways. The lower back does not enjoy being twisted so the push must keep the shoulders directly in line with the hips. So the stride starts with the shoulders, hips and feet all facing directly towards the target. They remain facing the target until both the knee and ankle have finished pushing. This will allow the pitcher to generate enough power to push the hips ahead of the shoulders by the time toe touch arrives.
A very common mistake for pitchers is having the foot turn sideways on the pitching plate before the push is completed. Fix that before it becomes a habit.
|
 |
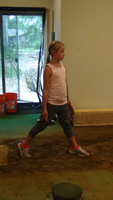
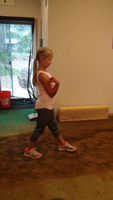
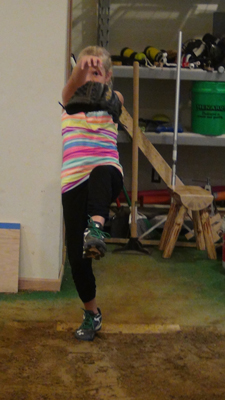
| Proper Ball Path Around the Circle
|
 |
In the front side of the circle, the ball should be in front of the face. On the back side the ball should be above the power line. How does this transition happen? This simple exercize will show you.
Stand facing the target, like you are pushing straight forward. Raise your arm so that your upper arm is brushing the side of your head between your ear and your eye. Don't twist the arm. The ball is naturally facing the target. Relax the wrist and the ball will flop forward. Relax the elbow so that is not locked out straight. If you drew a line straight down from your hand the line would directly in front of your forehead. Now turn sideways and look in a mirror where the target would be. You will see the ball directly above the power line, the elbow behind the head just inside the power line, the ball facing third base (for a RHP), the elbow slightly flexed and all the arm muscles relaxed - perfect technique at that point in the cicle.
A very common mistake is to bring the ball up on the power line with the arm locked out straight. Fix that before it becomes a habit.
|
 |
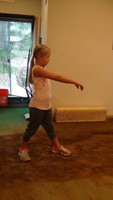
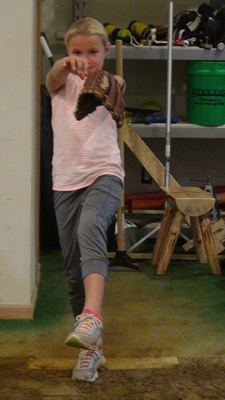
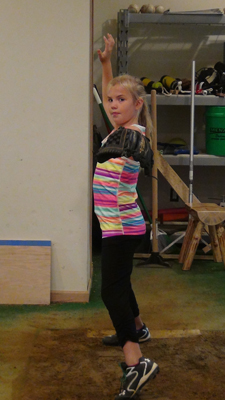
| Proper Position at Toe Touch
|
 |
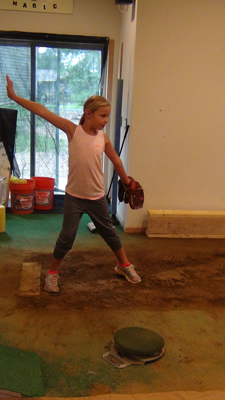
The stride foot will come down when the upper arm is somewhere around the 1 o'clock position, just past straight up. Great pitchers have some variation here but they are all between straight up and straight back. The majority of the great pitchers get to toe touch at about the 1 o'clock position. At toe touch the hips and shoulders should be pointing directly sideways, not most of the way. The body will naturally turn back towards the target during the throw and if the student is not fully facing sideways at toe touch she will tend to have her shoulders facing too much towards the target at release and will end up pulling the ball through release instead of throwing it through release.
A very common mistake is to not have both the hips and shoulders fully open (facing sideways) at toe touch. Fix that before it becomes a habit. Also toe touch is a good time to check to seeif the push was powerful enough to get the left hip closer to the target than the left shoulder (RHP) and that the elbow flex created by bringing the ball up in front of theface has not diminished. Also check to see that the ball is on the power line as students tend to bring the ball behind their heads.
|
 |
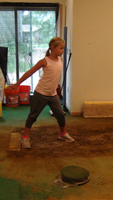
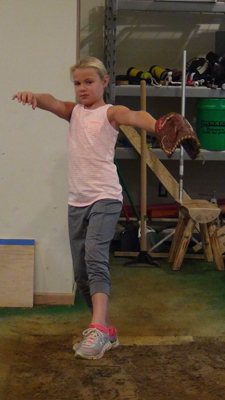
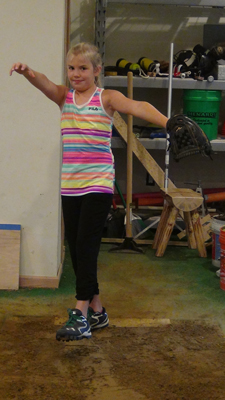
| Proper Position at Pre-release
|
 |
This is the hardest thing for most students to master. It is also the single most important thing that separates the reallly good pitchers from the riff-raff. The previous three things must be executed very well to give the student a chance to do this well. Even if the first three are done well, there are many things that can go wrong.
The proper position at pre-release is that the hips and shoulders have rotated somewhat towards the target. The elbow makes connection with the body at the front edge of the hip bone so that the hand and elbow can reach the release point without running into the leg. The hand lags, or the elbow is flexed, about 30 to 45 degrees. The ball is facing out and the wrist is flat as opposed to cocked. Simple to describe, but hard to master.
A common problem is losing the elbow flex before the elbow connects to the body. Another one is rotating the hips and/or shoulders more that 45 degrees from fully open. If either of those becomes a habit it may be difficult, if not impossible, to fix later on. Without getting to the proper position the pitcher will never generate speed beyond what she can generate as a 12U player, except for getting taller. As a girl matures and develops strength in her body, especially in the legs, using the whipping motion will allow for significant increases in speed as well as increase the ability to put spin on the ball. It may take time, but constantly remind the student of the need to get to pre-release in the proper position. Do as many drills as are necessary but fix the problem, and fix it early on.
|
 |
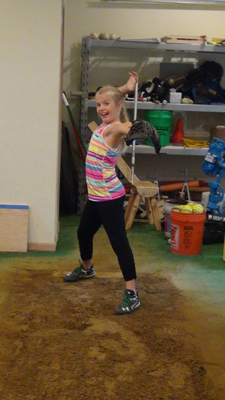
| Swing the Forearm Down Through and Up
|
|
Once the students gets to pre-release in the proper position the upper arm stabalizes against the body (yes, it stops its rotation). The ball needs to stay on the power line and when the elbow is fully extended the forearm should be straight up and down or very close to it. The action of extending the elbow will rotate the hand to face the target at release. At the same time as the elbow is straightening out the hips and shoulders are rotating from pre-release to about 45 degrees at release. Those student who arrive at pre-release with a 45 degree rotation must not do any additional rotation until the ball passes the hip. At release give the ball a push with the finders but do not snap the wrist. After release the forearm continues forward as the elbow flexes again further rotating the hand so that the baack of the hand is facing the sky. Very important is that the elbow releases away from the hip bone.
A common problem is the hand straying too far away from the leg at release resulting in kind of a sidearm, and illegal, pitch. Another common problem is not allowing the elbow to release away from the hip. Fix those.
|
|
So those are the five things that every student needs to focus on. Everything beyond those basic concepts will be refinements to take the student from really good to the next level, whatever that is.